Uploading Images
Click on the green Add Content button to begin creating content on your site. A pop-up window will appear asking you to select between the different content items. Click on the Image option to begin.
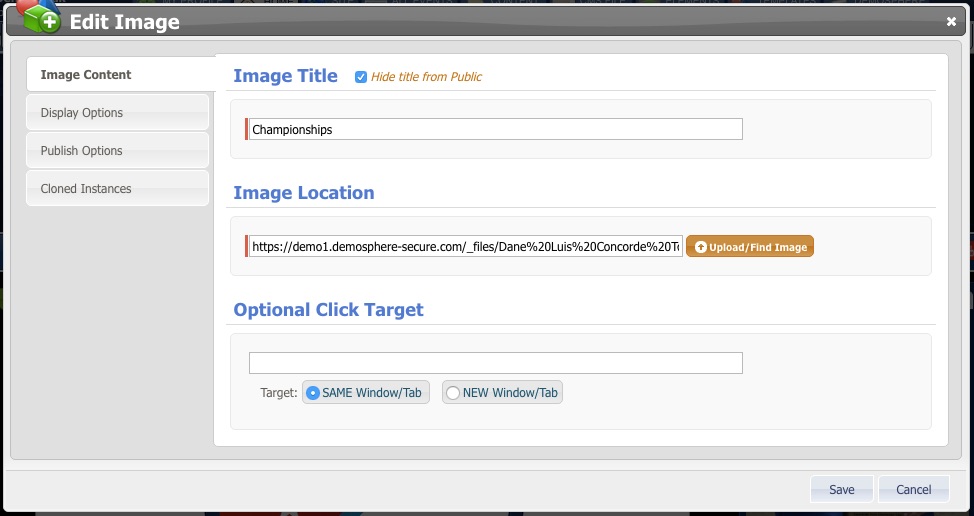
A new pop-up window will appear asking for a title for the image, an image location, and an optional click target.

Clicking on the Image Location button will open up the WebWriter CMS File Manager, which stores all of the image uploads that have been added to the system. You may choose to use one of the images that are already uploaded to the system, or you might want to upload a new image. To add a new photo, click the green Upload File button (top right). Click on the upload you'd like to use and hit Select File.
To Optional Click Target should be used if you would like the image to act as a link when clicked.


