

Adding and Managing Content Rotators
Depending on your template design, there will be a variety of available sections to place content. Click on the green Add Content button in any of the available locations to begin creating content on your site.
A pop-up window will appear asking you to select between the different content items. Click on the Content Rotator option to begin.
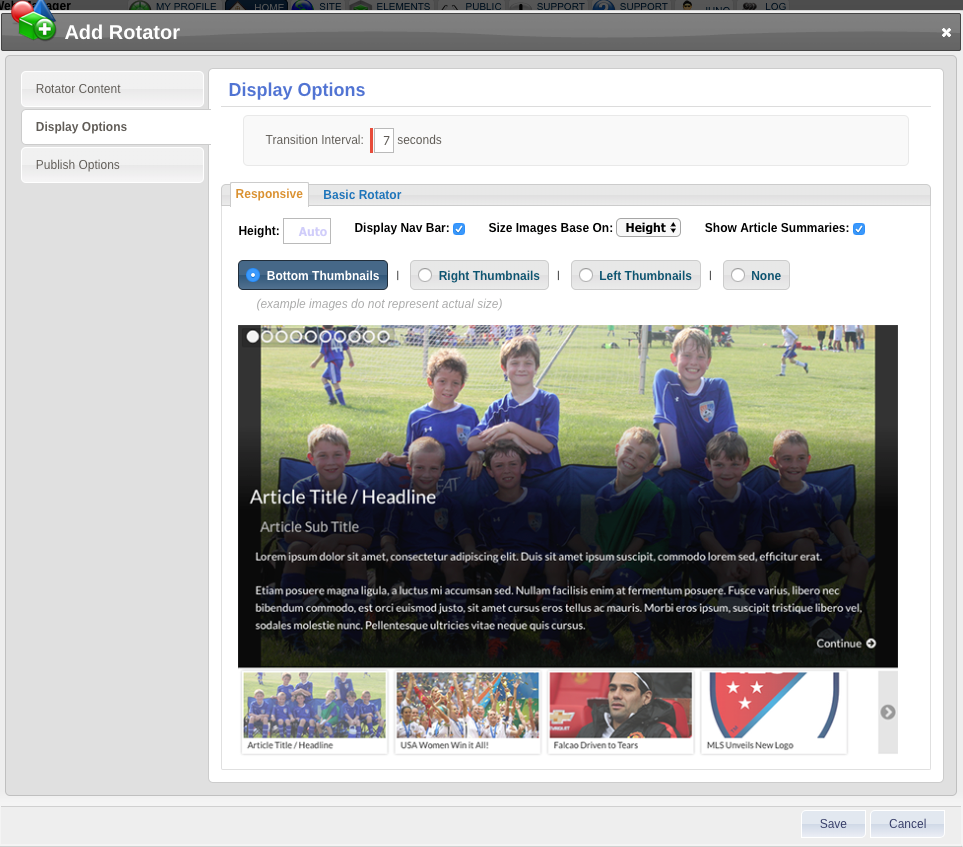
Within the Display Options tab, the Site Administrator has control over a handful of different customization options:
- Transition Interval: Set the exact number of seconds each article/image will show
- Rotator: Choose between Responsive (mobile-friendly) or Basic Rotator
- Within the Responsive Roator, you have additional options:
- Select the exact Height you want the rotator to display at (in pixels)
- Choose to display or not display the navigation 'bubbles'
- Set the images within the rotator to adjust to the full Height or full Width of the selected image
- Hide or Display a summary of article text on the rotator view
- Thumbnails: Set to display at the bottom, left, right or not at all
- Within the Responsive Roator, you have additional options:
Saving these options will result in an empty content rotator. Next, the Site Administrator will want to add content. Hovering over the right-hand corner of the published rotator will reveal the option to Add Content (Green Button).
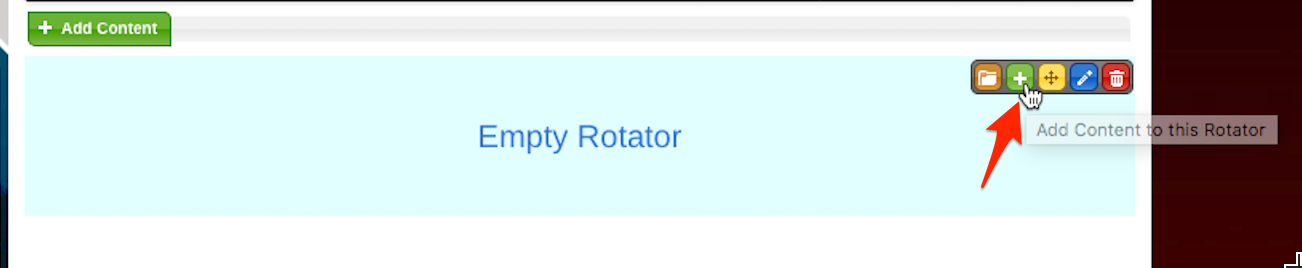
Articles, Raw Code, and/or Images are all able to be included as rotating objects in the content rotator.
The most popular option is to add an Article to the content rotator. This will allow you to display a rotating set of articles that your users can click on to find more information about. To set up your Articles, select the Article button on the Choose New Content Type to Add view.
There are three essential parts to adding Articles to your Content Rotator.
1) Write a brief Article Title. This will display on the Content Rotator. Avoid using long sentences or complex descriptions in the Title view. That information is best contained within the Story Content.
Article Title Examples:
- Tryouts Open Until March 1st - Act Now!
- U17 Girls Win Championship!
- Fundraising Starts June 18th - Sign Ups Open
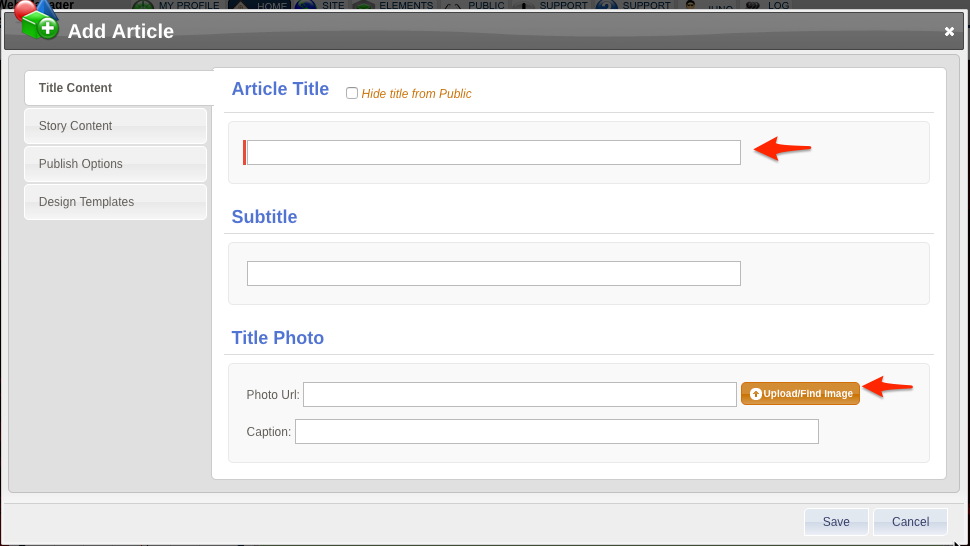
2) Select a Title Photo. This photo should showcase the content of the Article. If you opt to not select a photo, the Article will only display the Article Title as it scrolls through the rotation.
Title Photo Tips:
- Remember that all photos will display by the full Height or full Width of the selected photo. These settings can be controlled by editing the Content Rotator Settings (see above).
- Keep your Title Photo releveant by selecting images that portray the theme or intent of the Story Content. Selecting Title Photos that have a lot of text or detailed information can lead to users missing information due to the rotation of the Article.
- Make sure to keep the orientation of all Titles the same across all articles. For example: A portrait orientation image may be cut off if the photo display is set to display at full width.
3) Write Story Content. Include all relevant details for your event/notice/annoucement on the tab for Story Content. Include all relevant details such as Times, Dates and Deadlines, Links, Images, and General Descriptions of the Article. Note: The Title Photo added on the Title Content tab will display at the top of the Article when users click on it to learn more information. There is no need to use the same image within the Story Content editor.
Check out this Content Article document for more infomartion on adding and editing Articles.
Guides are also available on how to add Images and Raw Code to your Content Rotators.